What Time Doctor Does
Time Doctor is a time tracking and employee monitoring platform built for remote and hybrid teams. It records the hours you work, captures screenshots, measures activity levels from your mouse and keyboard, logs the apps and websites you use, and rolls all of it into reports that managers use to understand how work time is spent.
This guide is the practical companion to our Time Doctor review. Instead of judging whether the tool is worth it, here we walk through how to actually use it — from creating an account and installing the desktop app to configuring screenshots, reading reports, and setting up payroll. Whether you are an administrator rolling Time Doctor out to a team or an employee who just received an invite, this walkthrough covers what you need.
Time Doctor sits in the same category as Hubstaff, DeskTime, and Insightful, but its defining trait is the timer-first workflow: in most setups, you choose a task and start a timer, and the hours you log carry the weight of being deliberately tracked. Understanding how that workflow is configured is the key to using the tool well.
Setting Up Time Doctor
Creating Your Account and Workspace
To get started, sign up at the Time Doctor website and create a company workspace. The 14-day free trial unlocks full Premium features with no credit card required, which is enough time to configure everything and test it with a small group before committing.
During setup you will name your company, set your time zone, and define your first projects. Projects are the top-level buckets that time gets logged against — think client names, internal initiatives, or departments. You can refine these later, so do not over-engineer the structure on day one.
Installing the Desktop App
Time Doctor's monitoring features live in its desktop application, available for Windows, macOS, and Linux. The web dashboard handles reports and administration, but screenshots, activity tracking, and app monitoring only work when the desktop app is installed and running on each tracked computer.
After downloading the installer for your operating system, sign in with your Time Doctor credentials. The app places a small timer widget in your system tray. There is also a Chrome extension for browser-based time tracking, which is useful for people who work primarily inside web apps, though it captures less detail than the desktop client.
Inviting Your Team
From the web dashboard, go to the Users or Manage Users section and invite team members by email. Each person receives an invitation link, creates a password, and installs the desktop app. You can assign people to specific projects and set their role — regular user, manager, or admin — which controls what data they can see.
Before inviting a full team, decide on your tracking mode and screenshot policy (covered below). Rolling those settings out consistently from the start avoids confusion and the awkward situation of changing monitoring rules after people have already started using the tool.
How to Track Time
Interactive vs Silent Tracking
Time Doctor offers two fundamentally different tracking modes, and choosing between them is the most important configuration decision you will make:
| Interactive (Manual) | Silent (Automatic) | |
|---|---|---|
| How it starts | Employee clicks Start on a task | Runs automatically at login |
| Visible interface | Timer widget the user controls | Often runs in the background |
| Task-level data | Yes — time tied to chosen task | Limited — attendance focused |
| Idle pop-ups | Yes, when input stops | No prompts shown |
| Best for | Freelancers, project teams | Always-on attendance tracking |
In interactive mode, you pick a task and press Start. The timer runs until you stop it, and the time is billed to that specific task. This gives clean, project-level data and lets employees control when monitoring happens — the default experience most people associate with Time Doctor.
In silent mode, an administrator deploys the app to run automatically from login. There is usually no timer to start and sometimes no visible interface at all. This suits employers who want continuous attendance monitoring, but it removes the employee's control over when tracking is active. Which mode you are in is set by your company — if you are unsure, check whether a timer appears in your system tray when you log in.
Projects, Tasks, and Manual Time
Within each project you can create tasks — the specific pieces of work people track against. Assigning time to tasks rather than just projects produces far more useful reports, showing not only how many hours a project consumed but which activities ate the most time.
If someone forgets to start the timer, they can add manual time from the web dashboard by entering the date, start and end times, project, and task. Manual entries are flagged as manually added and contain no screenshots or activity data, so managers can distinguish them from automatically tracked time. Administrators can restrict or disable manual time entry, so confirm whether it is available in your workspace.
Configuring Monitoring Settings
The monitoring controls live in the company dashboard under Settings, and most are admin-only. The three that matter most are screenshots, activity and idle detection, and web and app tracking.
Screenshots and Screen Recording
Screenshots are available on every plan, including Basic. In Settings you can choose the capture interval (commonly every 3, 5, or 10 minutes), turn on screenshot blur to obscure sensitive content while still showing general activity, and decide whether employees may delete individual screenshots before they sync. Note that deleting a screenshot also removes the tracked time tied to it. On the Standard and Premium plans you can enable video screen recording for a continuous record rather than periodic snapshots — useful for high-trust roles but heavier on privacy.
Activity Levels and Idle Detection
Time Doctor calculates an activity level from mouse and keyboard input during each tracked session. Under Settings you can configure the idle threshold — how many minutes without input before the app shows an idle prompt asking whether the user is still working. In interactive mode, ignoring that prompt stops the timer so the idle period is not counted. Setting the threshold too aggressively (for example, one or two minutes) generates frequent interruptions and frustrates employees whose work includes reading, calls, or thinking away from the keyboard.
Web and App Monitoring
Time Doctor logs every application and website used while tracking, along with the time spent in each. In Settings, administrators can build productivity ratings (marking certain apps or sites as productive, unproductive, or neutral) and configure distraction alerts that nudge employees when they spend too long on non-work sites. You can also restrict which categories of data are collected to comply with regional privacy rules. For an employee perspective on what this tracking captures and why activity sometimes dips through no fault of your own, see our guide on how Time Doctor tracks activity.
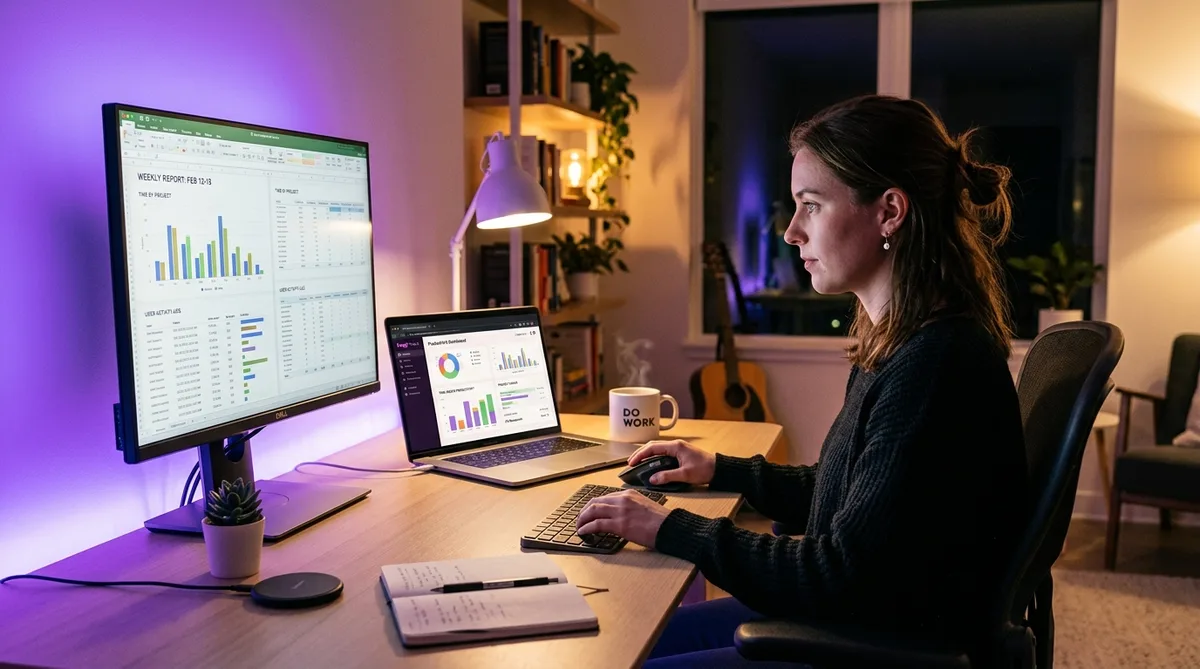
Reading Reports and Productivity Data
The reporting dashboard is where Time Doctor's data becomes useful. The reports most teams rely on are:
- Timeline — a chronological view of what each person worked on, with screenshots and activity levels inline.
- Activity Summary — total hours, average activity percentage, and a breakdown by project and task.
- Web & App Usage — ranked list of the applications and sites that consumed the most time.
- Attendance — who started on time, who was late, and who is currently online.
- Productivity — time split across productive, unproductive, and neutral categories based on your ratings.
A useful habit is to read activity levels in context rather than as a strict score. A 50% activity level on a day full of client calls and document review is not the same as 50% on a heads-down coding day. Pairing the numbers with the timeline view prevents the common mistake of treating raw percentages as a productivity grade. Managers can schedule these reports to arrive by email daily or weekly.
Integrations and Payroll
Starting on the Standard plan, Time Doctor connects to 60+ tools including Jira, Asana, Trello, Slack, Salesforce, and Google Workspace. Integrations let you start timers directly from a task in your project management tool and pull task context into Time Doctor's reports, so hours line up with real work items instead of vague projects.
Time Doctor also includes payroll on Standard and above. You set each person's pay rate (hourly or salaried), Time Doctor calculates totals from approved timesheets, and it pushes payments through providers like PayPal, Payoneer, and Wise. To use it, enable payroll in Settings, set the pay period and currency, add rates per user, and approve timesheets before each run. This is what makes Time Doctor popular with agencies and outsourcing firms that pay contractors by tracked hours.
Tips to Get the Most Out of Time Doctor
A few practices separate teams that get value from Time Doctor from those that just create friction:
- Track tasks, not just projects. Task-level data is what turns Time Doctor from a surveillance tool into a genuine planning tool. Vague project tracking produces vague reports.
- Tune idle detection sensibly. A 3–5 minute idle threshold balances accuracy against constant interruptions. Anything shorter punishes normal work rhythms.
- Use screenshot blur. If you need visual proof of work but want to respect privacy, blur strikes a reasonable middle ground and reduces the surveillance feel.
- Read activity levels with context. Calls, reading, and design review naturally produce lower input. Judging people on raw percentages alone is the fastest way to lose their trust.
- Set a clear policy. Tell employees exactly what is tracked, when, and why. Transparency does more for morale than any feature setting.
That last point cuts both ways. Activity-based monitoring rewards constant mouse and keyboard input, which does not always match where real work happens — reviewing a contract, joining a video call, or thinking through a problem on a whiteboard all register as low activity. This is the gap between work that is real and work that is measured. If your role involves long stretches away from the keyboard and you need your activity to reflect that you are present and working, TrickTack simulates the natural mouse movements, keystrokes, scrolling, and app switching that Time Doctor measures, so a quiet stretch of focused work or a long call does not read as idle. You can see exactly which inputs it generates in the documentation.
Keep Your Time Doctor Activity Consistent
TrickTack simulates mouse movement, keyboard input, scrolling, and app switching — every signal Time Doctor measures for activity levels. Try it free for 7 days.
DownloadFrequently Asked Questions
How do I start tracking time in Time Doctor?
After installing the desktop app and signing in, you start tracking by selecting a task or project and clicking Start on the timer widget. In interactive mode, the timer runs until you click Stop, take a break, or trigger idle detection. In silent (automatic) mode, configured by an administrator, tracking begins as soon as you log in and runs in the background without manual input. You can confirm tracking is active by checking the timer in your system tray, which shows the elapsed time for the current task.
Can I turn off screenshots in Time Doctor?
Whether screenshots can be disabled depends on your company's settings, not your own. Screenshot frequency, blur, and whether screenshots are taken at all are controlled by administrators under Settings. As an employee you usually cannot turn them off. You can, however, delete individual screenshots before they sync if your admin enabled that option, but deleting one also removes the associated tracked time. Administrators can enable screenshot blurring to obscure sensitive content while still showing general activity.
What is the difference between interactive and silent tracking?
Interactive (manual) tracking requires the employee to start and stop the timer for each task, giving direct control over when monitoring is active and which task the time is billed to. Silent tracking runs automatically in the background from the moment the computer starts, with no timer to start or stop and often no visible interface. Interactive mode suits freelancers and project-based teams that want accurate task-level data; silent mode suits employers who want continuous attendance monitoring without relying on people to remember the timer.
How do I add manual time in Time Doctor?
If you forgot to start the timer, you can add time manually from the web dashboard under the Edit Time or Manual Time section, where you enter the date, start and end times, project, and task. Manual entries are flagged as manually added so managers can see they were not automatically tracked, and they contain no screenshots or activity data. Administrators can restrict or disable manual time entry entirely, so the option may not be available depending on your company's configuration.
Does Time Doctor track me outside of work hours?
In interactive mode, Time Doctor only tracks while the timer is running, so stopping the timer ends all monitoring. In silent mode, tracking is tied to your computer being on and logged in, so it can record activity outside scheduled hours if the machine stays on. Time Doctor does not track when the app is closed or the computer is off, and it is designed to monitor work devices rather than personal phones. Check your company's work schedule settings, which can limit tracking to defined working hours.
Conclusion
Time Doctor is straightforward to use once you understand its two big levers: the tracking mode (interactive versus silent) and the monitoring settings (screenshots, activity, idle, and app tracking). Get those right for your team and the reports become genuinely useful for planning, billing, and payroll rather than just surveillance.
If you are evaluating whether the tool fits your team at all, read our full Time Doctor review for the pros, cons, and pricing, or compare it head-to-head in Hubstaff vs Time Doctor. And if you are an employee who needs your activity levels to reflect the real work you do — including the parts that happen away from the keyboard — TrickTack was built for exactly that.

